How to Make a Fairy Garden
Over the last 12 months I’ve noticed that Fairy Gardens have become increasingly popular, from tiny fairy doors on trees, to extravagant forests dedicated to our fairy friends.
We’ve visited several places that have had some sort of fairy garden, and it’s always proved a magical experience for my boys.
With all of this in mind I decided to make our own Fairy Garden with them.
Here’s how we made our own Fairy Garden.
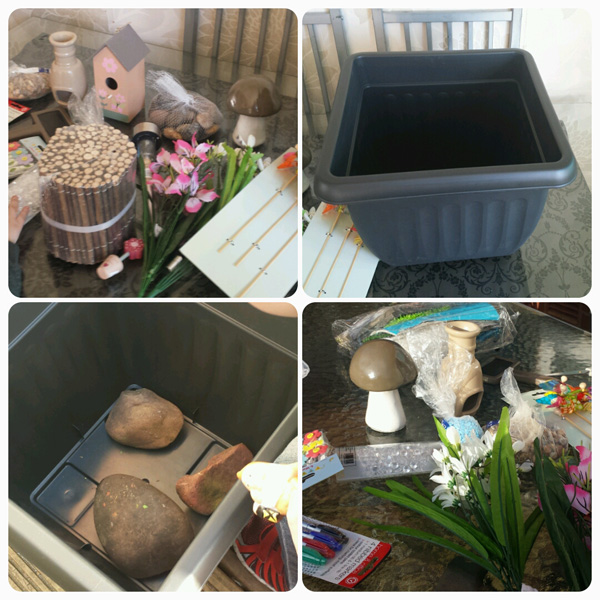
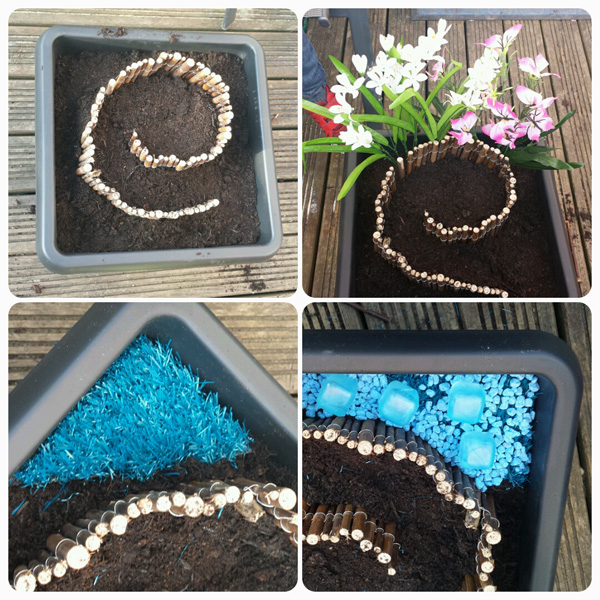
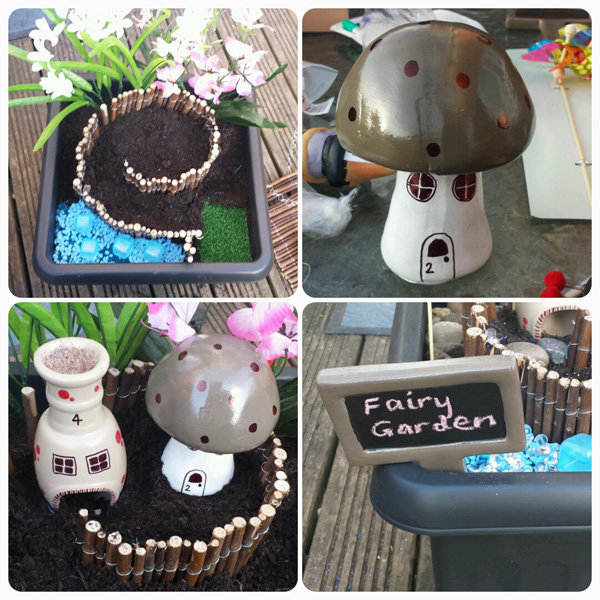
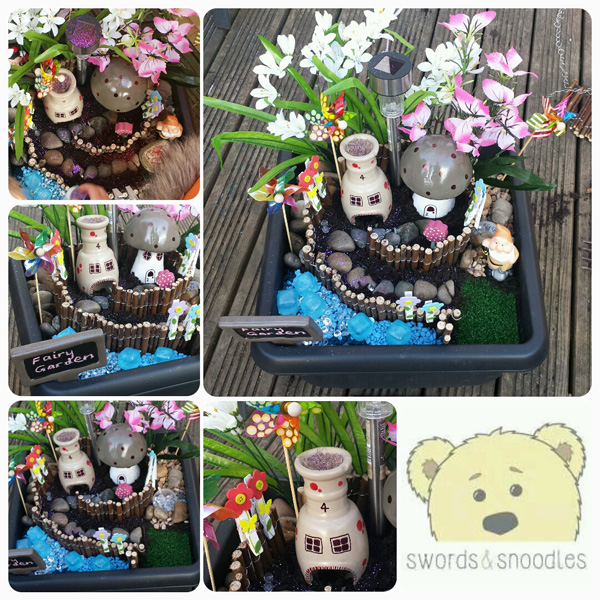
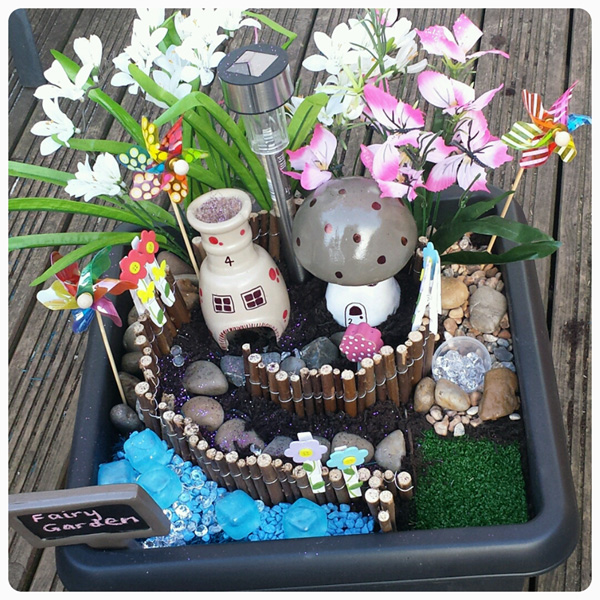
We used a large black flower pot for the base, and filled it with heavy stones, and the soil. We visited several cheap, local shops and chose items we thought would look ‘fairy’. We brought wooden border roll, a stone mushroom, a stone mini-log burner, a wooden bird house (which we didn’t end up using), artificial flowers, large stones, small flat pebbles, glitter, scattering gems, a solar light, mini windmills, blue gravel, stone gravel, decorative pegs, a mini gnome, and a tiny wooden flower.
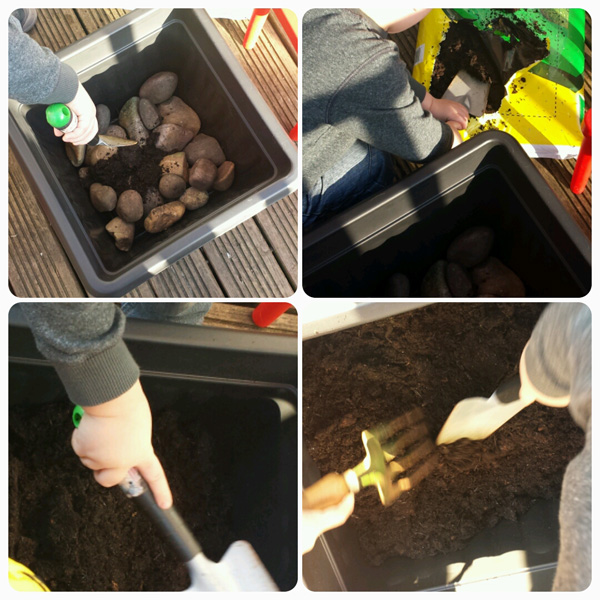
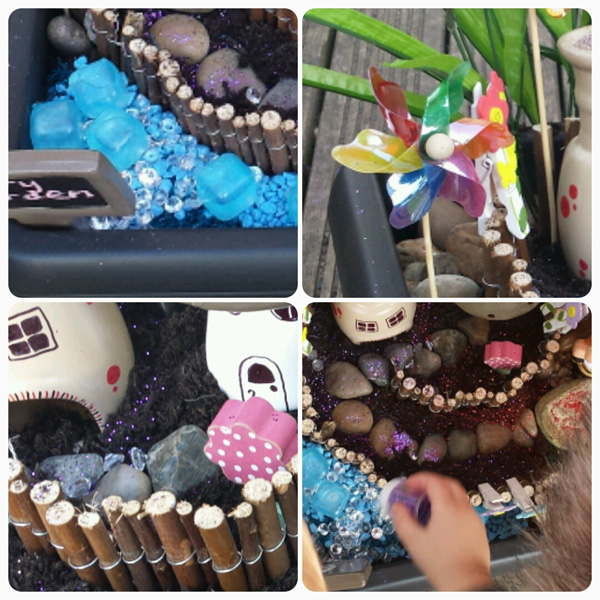
We filled the black flower pot with heavy stones to about halfway and then filled the rest with soil. I used the wooden border roll to create a sloped pathway by filling it in with soil on a gradient. We added artificial flowers at the back and used some blue grass samples to create a ‘magical gem filled pond’. We used blue gravel, blue plastic ice cubes, and scatter gems for our pond. We used some wooden sticks to create a dam at one end of the pond, as requested by my four year old! We also used a green grass sample to place at the bottom of the pathway. I used permanent markers to draw doors and windows onto our mini burner and our mushroom, and added spots for a toadstool effect. We put these at the top of our sloped pathway. We also purchased a fantastic plant marker that we wrote ‘Fairy Garden’ on.
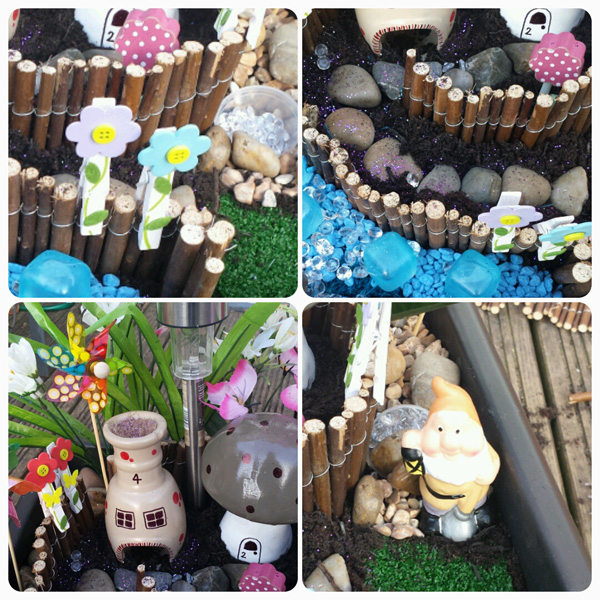
We used our smaller flat pebbles to mark the pathway to the fairy houses, and we placed our solar light in the centre of the houses. We decorated the area with flower pegs, windmills, and a mini wooden flower. We added a gnome and a pot of scattering gems too which my four year old called ‘the fairy treasure’. We filled in the blank pieces of soil with gravel, and then we sprinkled fairy dust over it all (glitter).
Here is our finished Fairy Garden below. My boys absolutely love it, and they keep checking for fairy friends! It was a great addition to our garden, and was a lot of fun making it. You can use anything to make your Fairy Garden, thats the great thing about DIY projects! The only limit is your imagination.
Have a go at your own Fairy Garden and share your pictures with me on Facebook or Twitter, I’d love to see them!
Happy Fairy Garden making!
This post was due to go live on 21st March 2015, but I postponed it after a family emergency. My nan sadly passed away the next day. I’ve decided to dedicate this project to her, and keep this Fairy Garden in her memory. RIP Nanny B xx